Starting a 3D Print Farm in 2025: The Complete Budget-Friendly Guide
Learn how to build a profitable 3D print farm with affordable printers, proper setup techniques, and expert maintenance tips. Perfect for entrepreneurs and hobbyists looking to scale.
Look, I’m not going to sugarcoat it. When I first started my 3D print farm three years ago, I made pretty much every mistake possible. I had printers crammed together like sardines, blew circuits weekly, and once had to evacuate my workspace after printing ABS in a poorly ventilated room (not my proudest moment).
But you know what? Those mistakes taught me everything I know about running a successful print farm. So grab a coffee, and let me walk you through how to do this right the first time.
My Routine as a 3D Print Farmer
Budget-Friendly Workhorse Printers That Won’t Let You Down
First things first—you need reliable machines that won’t make you pull your hair out or empty your wallet. After testing dozens of printers over the years, these are my top picks actually available on MatterHackers right now.
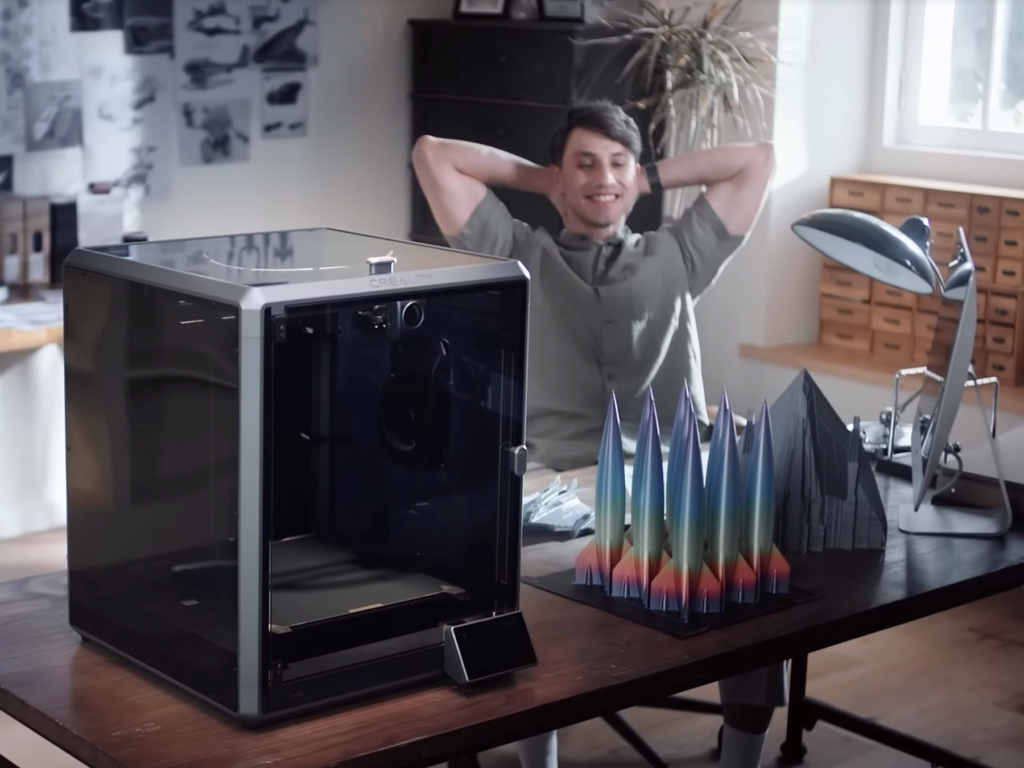
Creality K1 Max: The Speed Demon
When I upgraded my first print farm machine to the K1 Max, my production capacity literally doubled overnight. This thing is absurdly fast.
What makes it great for a print farm:
- Core XY design that can hit 600mm/s without breaking a sweat (and actually maintain quality)
- Built-in AI camera monitoring that’s caught failures before they waste material
- 300 x 300 x 300mm build volume perfect for batch production
- Active vibration compensation that lets you stack multiple units without quality loss
At around $899 from Amazon, it’s pricier than what I started with, but the sheer output makes the ROI calculation a no-brainer.
I’ve literally paid for mine in productivity gains within two months.
Creality K1 Max Review
Sovol SV08: The Workhorse Champion
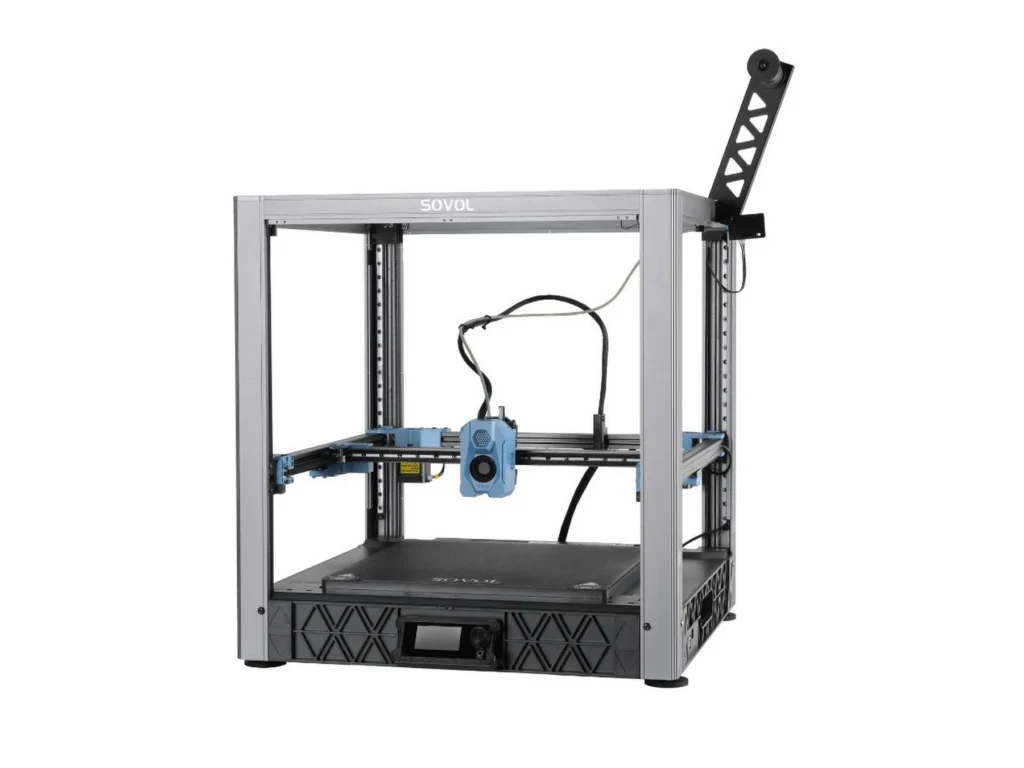
This printer doesn’t get nearly the attention it deserves. In my farm, it’s been the most consistent performer, especially for the price point.
Why I love it:
- Double Z-axis lead screws for rock-solid stability during long production runs
- Direct drive extruder that handles even the trickiest filaments without complaint
- Removable PEI-coated spring steel build plate that makes part removal actually enjoyable
- All-metal hotend that can handle higher temp materials without degradation
…this machine delivers reliability that printers twice its price struggle to match.
I have five running almost non-stop in my current setup.
Why do so many people LOVE THIS PRINTER! – Sovol SV08 Review
Prusa MK4: The Legendary Reliability

If “it just works” is your main criteria, nothing beats a Prusa. These are the Toyota Corollas of the 3D printing world.
What continually impresses me:
- Fully automated calibration that eliminates the most common print failures
- NextGen Loadcell that makes first layer calibration actually foolproof
- Superb cooling system that produces immaculate overhangs and bridges
- Print farm mode specifically designed for multiple-unit operations
My oldest Prusa has over 8,000 print hours with just basic maintenance.
Prusa MK4 Review – Is the Quality Worth the Price?
Setting Up Your Print Farm Without Disasters
When I first started, my “farm” was a disaster zone of tangled filament, extension cords, and fire hazards. Learn from my mistakes.
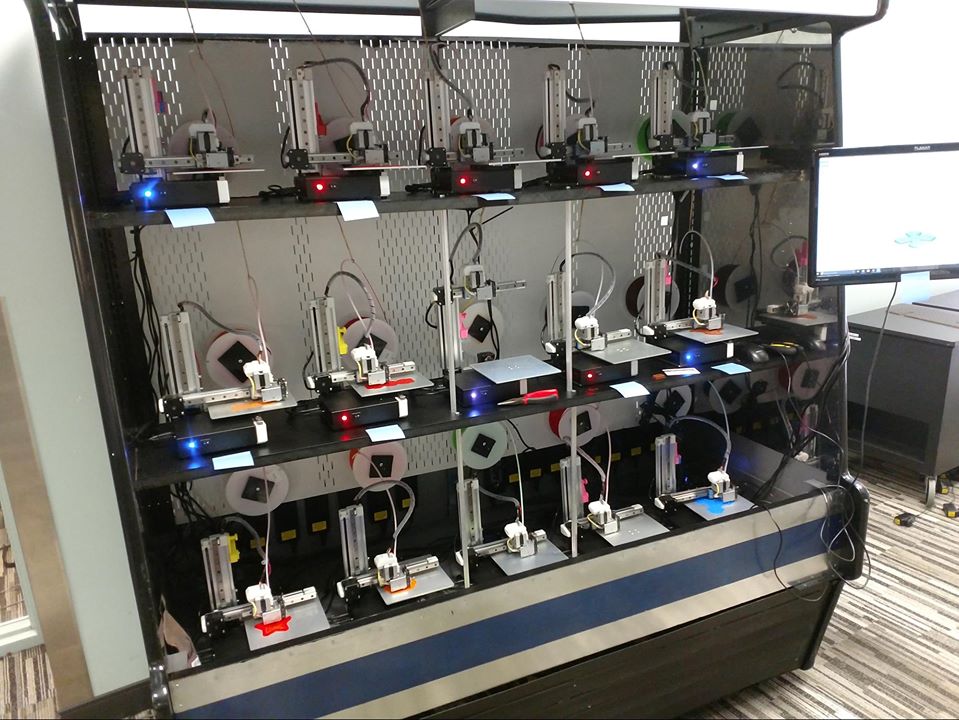
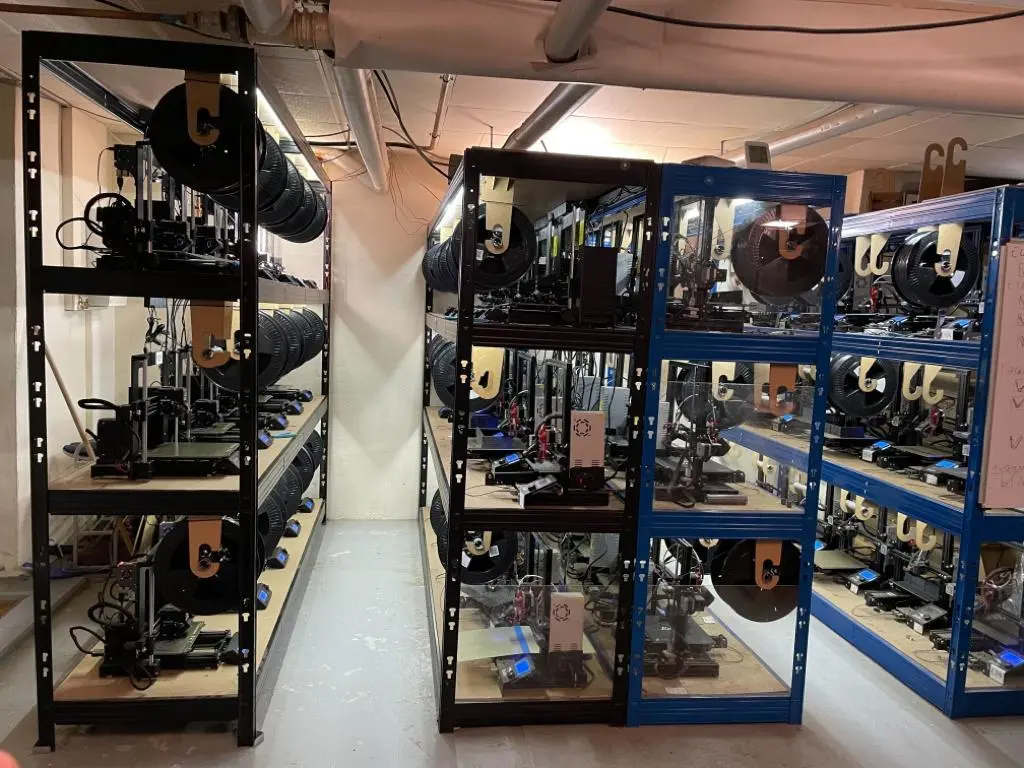
Layout: Think Like a Factory, Not a Hobbyist
The difference between a hobby setup and a farm is organization. Period.
- Keep 24 inches between printers minimum. Yes, it takes more space, but you’ll need access to all sides when inevitably one printer jams mid-run.
- Use sturdy shelving units like the Gladiator heavy-duty shelves. Not the cheap wire racks that wobble (I learned this the hard way when a slight bump caused layer shifts across three printers).
- Group printers by filament type. I keep all my PLA printers together, separate from PETG or ABS setups.
- Label everything—printers, spools, power outlets. When you’re rushing to fix something at 11 PM, you’ll thank me.
Power Management: Avoid My Embarrassing Blackout Story
Did I ever tell you about the time I took down the power for half my neighborhood trying to run 12 printers on a circuit designed for a toaster? Don’t be like me.
- Each standard home circuit handles about 1800 watts. A single Ender 3 pulls around 350W, so do the math.
- Invest in a dedicated circuit installation. I paid an electrician $350 to install two 20-amp circuits, and it was the best money I ever spent.
- Use quality surge protectors—not power strips—from brands like Tripp Lite or APC
- Keep a kill-a-watt meter handy to monitor actual power consumption.

Ventilation: Because Brain Cells Are Non-Renewable
My first “ventilation system” was opening a window. Don’t follow my example.
- For HEPA filtering, the Wham Bam Breathing Buddy from MatterHackers is specifically made for 3D printing and captures those nasty ultrafine particles.
- Build simple enclosures for ABS printers. I made mine with IKEA LACK tables and plexiglass for about $40 each.
- Install a proper exhaust fan that vents outside. I use a 6-inch inline duct fan ($80) connected to flexible dryer duct.
- Buy a real air quality monitor. The Awair Element ($299) has been a game-changer in knowing when ventilation is actually working.

Awair Element Air Quality Monitor – Hands-on Review
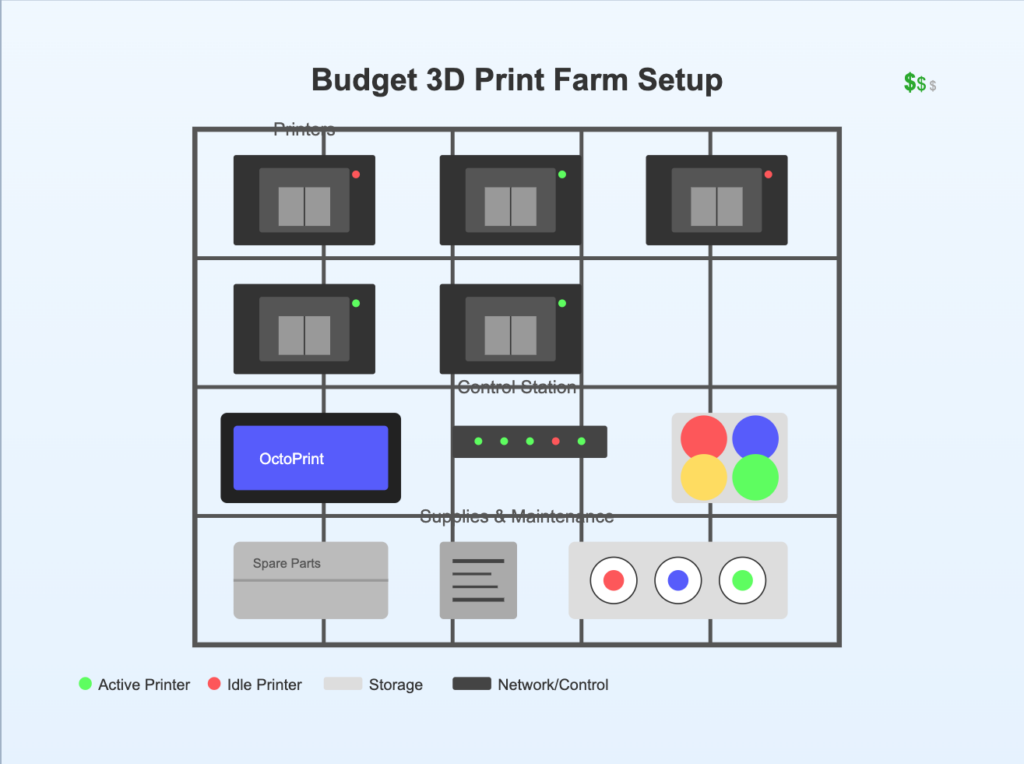
Networking: The Part I Wish Someone Had Explained to Me
Managing each printer individually is fine for one or two machines. With five or more? Absolute nightmare.
- OctoPrint is non-negotiable. I run a Raspberry Pi with OctoPrint for each printer, which lets me control everything remotely.
- The Obico plugin for OctoPrint adds AI failure detection that has saved me countless failed prints.
How to operate your 3d Printer REMOTELY – Access Octoprint from anywhere (Obico Setup)
- Static IP addresses for each Pi make management much easier.
- A dedicated router just for your print farm eliminates weird connectivity issues.
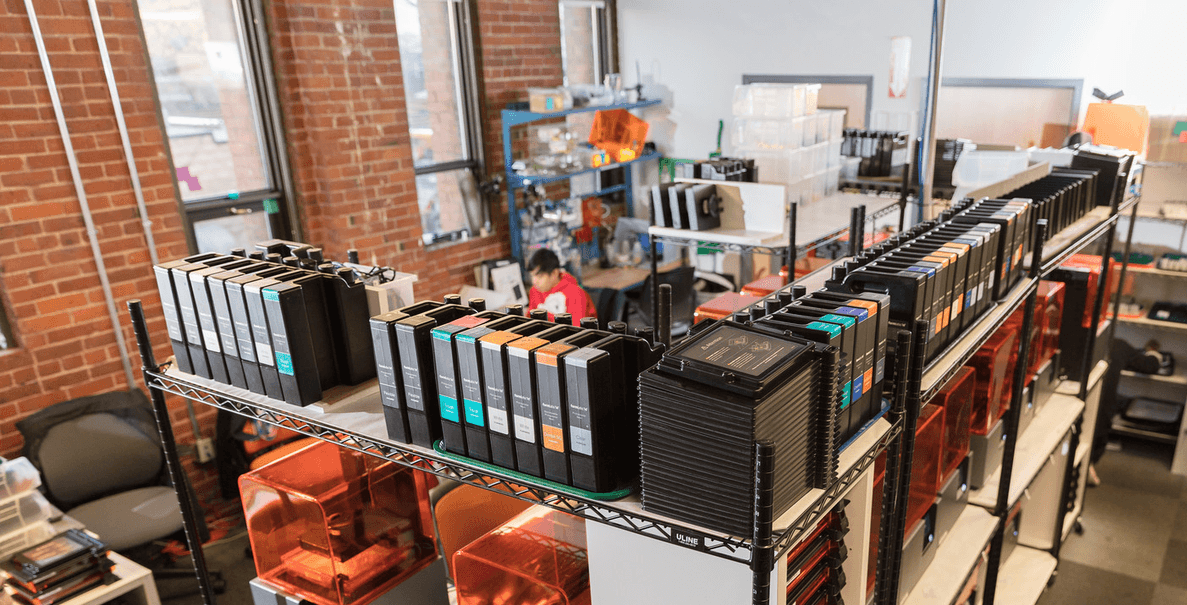
Filament Management: The Often Overlooked Expense
This might shock you, but after running the numbers, I realized filament was 62% of my ongoing costs. Here’s how to optimize:
- Buy MatterHackers PRO Series filament in bulk. Their 2kg spools have saved me about 15% compared to standard 1kg spools, and the quality is consistently excellent. For PLA, their PRO Series has been remarkably consistent batch-to-batch.
MatterHackers PRO Series 3D Printing Filament
- Store everything in airtight containers with desiccant. I use 5-gallon buckets with gamma seal lids ($12 each) and rechargeable desiccant packs.
- Track your usage meticulously. I use a simple spreadsheet showing cost per gram for each product I print.
- Set up a test protocol for new filament batches. My rule: I always print a temperature tower and bridging test before committing to large production runs.
Maintenance Routines That Have Saved My Business
I used to think maintenance was something you did when a printer broke. Now I know it’s what you do to prevent them from breaking.
Daily (takes 5 minutes per printer)
- Wipe down build plates with isopropyl alcohol
- Check filament paths for wear
- Remove any plastic debris from moving parts
Weekly (takes 15 minutes per printer)
- Lubricate linear rods and lead screws with a tiny drop of Super Lube
- Check belt tension (I use the “twang” method—it should sound like a low bass note)
- Clean cooling fans with compressed air
Monthly (takes 30 minutes per printer)
- Tighten all frame bolts (vibration loosens everything eventually)
- Replace nozzles proactively (MatterHackers Olsson Ruby nozzles are worth the investment for abrasive materials)
- Check all electrical connections
I calendar these maintenance sessions, and they’ve reduced my printer downtime by 78% over the past year.
Scaling Beyond Hobby Status
When I hit 10 printers, I realized I needed systems, not just more machines.
- Train someone else. Seriously, you can’t do it all yourself once you grow.
- Focus on a specific niche. My farm specialized in cosplay props, which meant I could optimize my entire workflow for similar parts.
- Implement batch processing. I now prepare all my build plates in the morning, start prints, and handle post-processing in batches.
- Document everything in standard operating procedures. I keep a binder with printer-specific quirks and settings.
Real Talk: Is This For You?
Starting a print farm isn’t for everyone. It requires mechanical aptitude, problem-solving skills, and a high tolerance for those moments when everything seems to go wrong at once.
But if you’re methodical, enjoy the process of optimization, and find satisfaction in creating physical products, it can be incredibly rewarding.
I went from a single Prusa Mini in my garage to a 16-printer operation that now pays my mortgage. It wasn’t quick, and it wasn’t always easy, but with the right approach, you can build something similar—hopefully with fewer rookie mistakes than I made.
Now excuse me while I go check on my printers. I think I hear one of them singing the “I’m about to fail” song…
Printing, Packing & Perfecting – A Productive Day in My 3D Print Farm!
Editor’s Note: All printers mentioned in this article are available from MatterHackers, and links are affiliate links. If you purchase through these links, I receive a small commission at no extra cost to you, which helps keep this site running and the advice flowing. Thanks for your support!